Creating and Using Realtime Interactive Presenter Agents
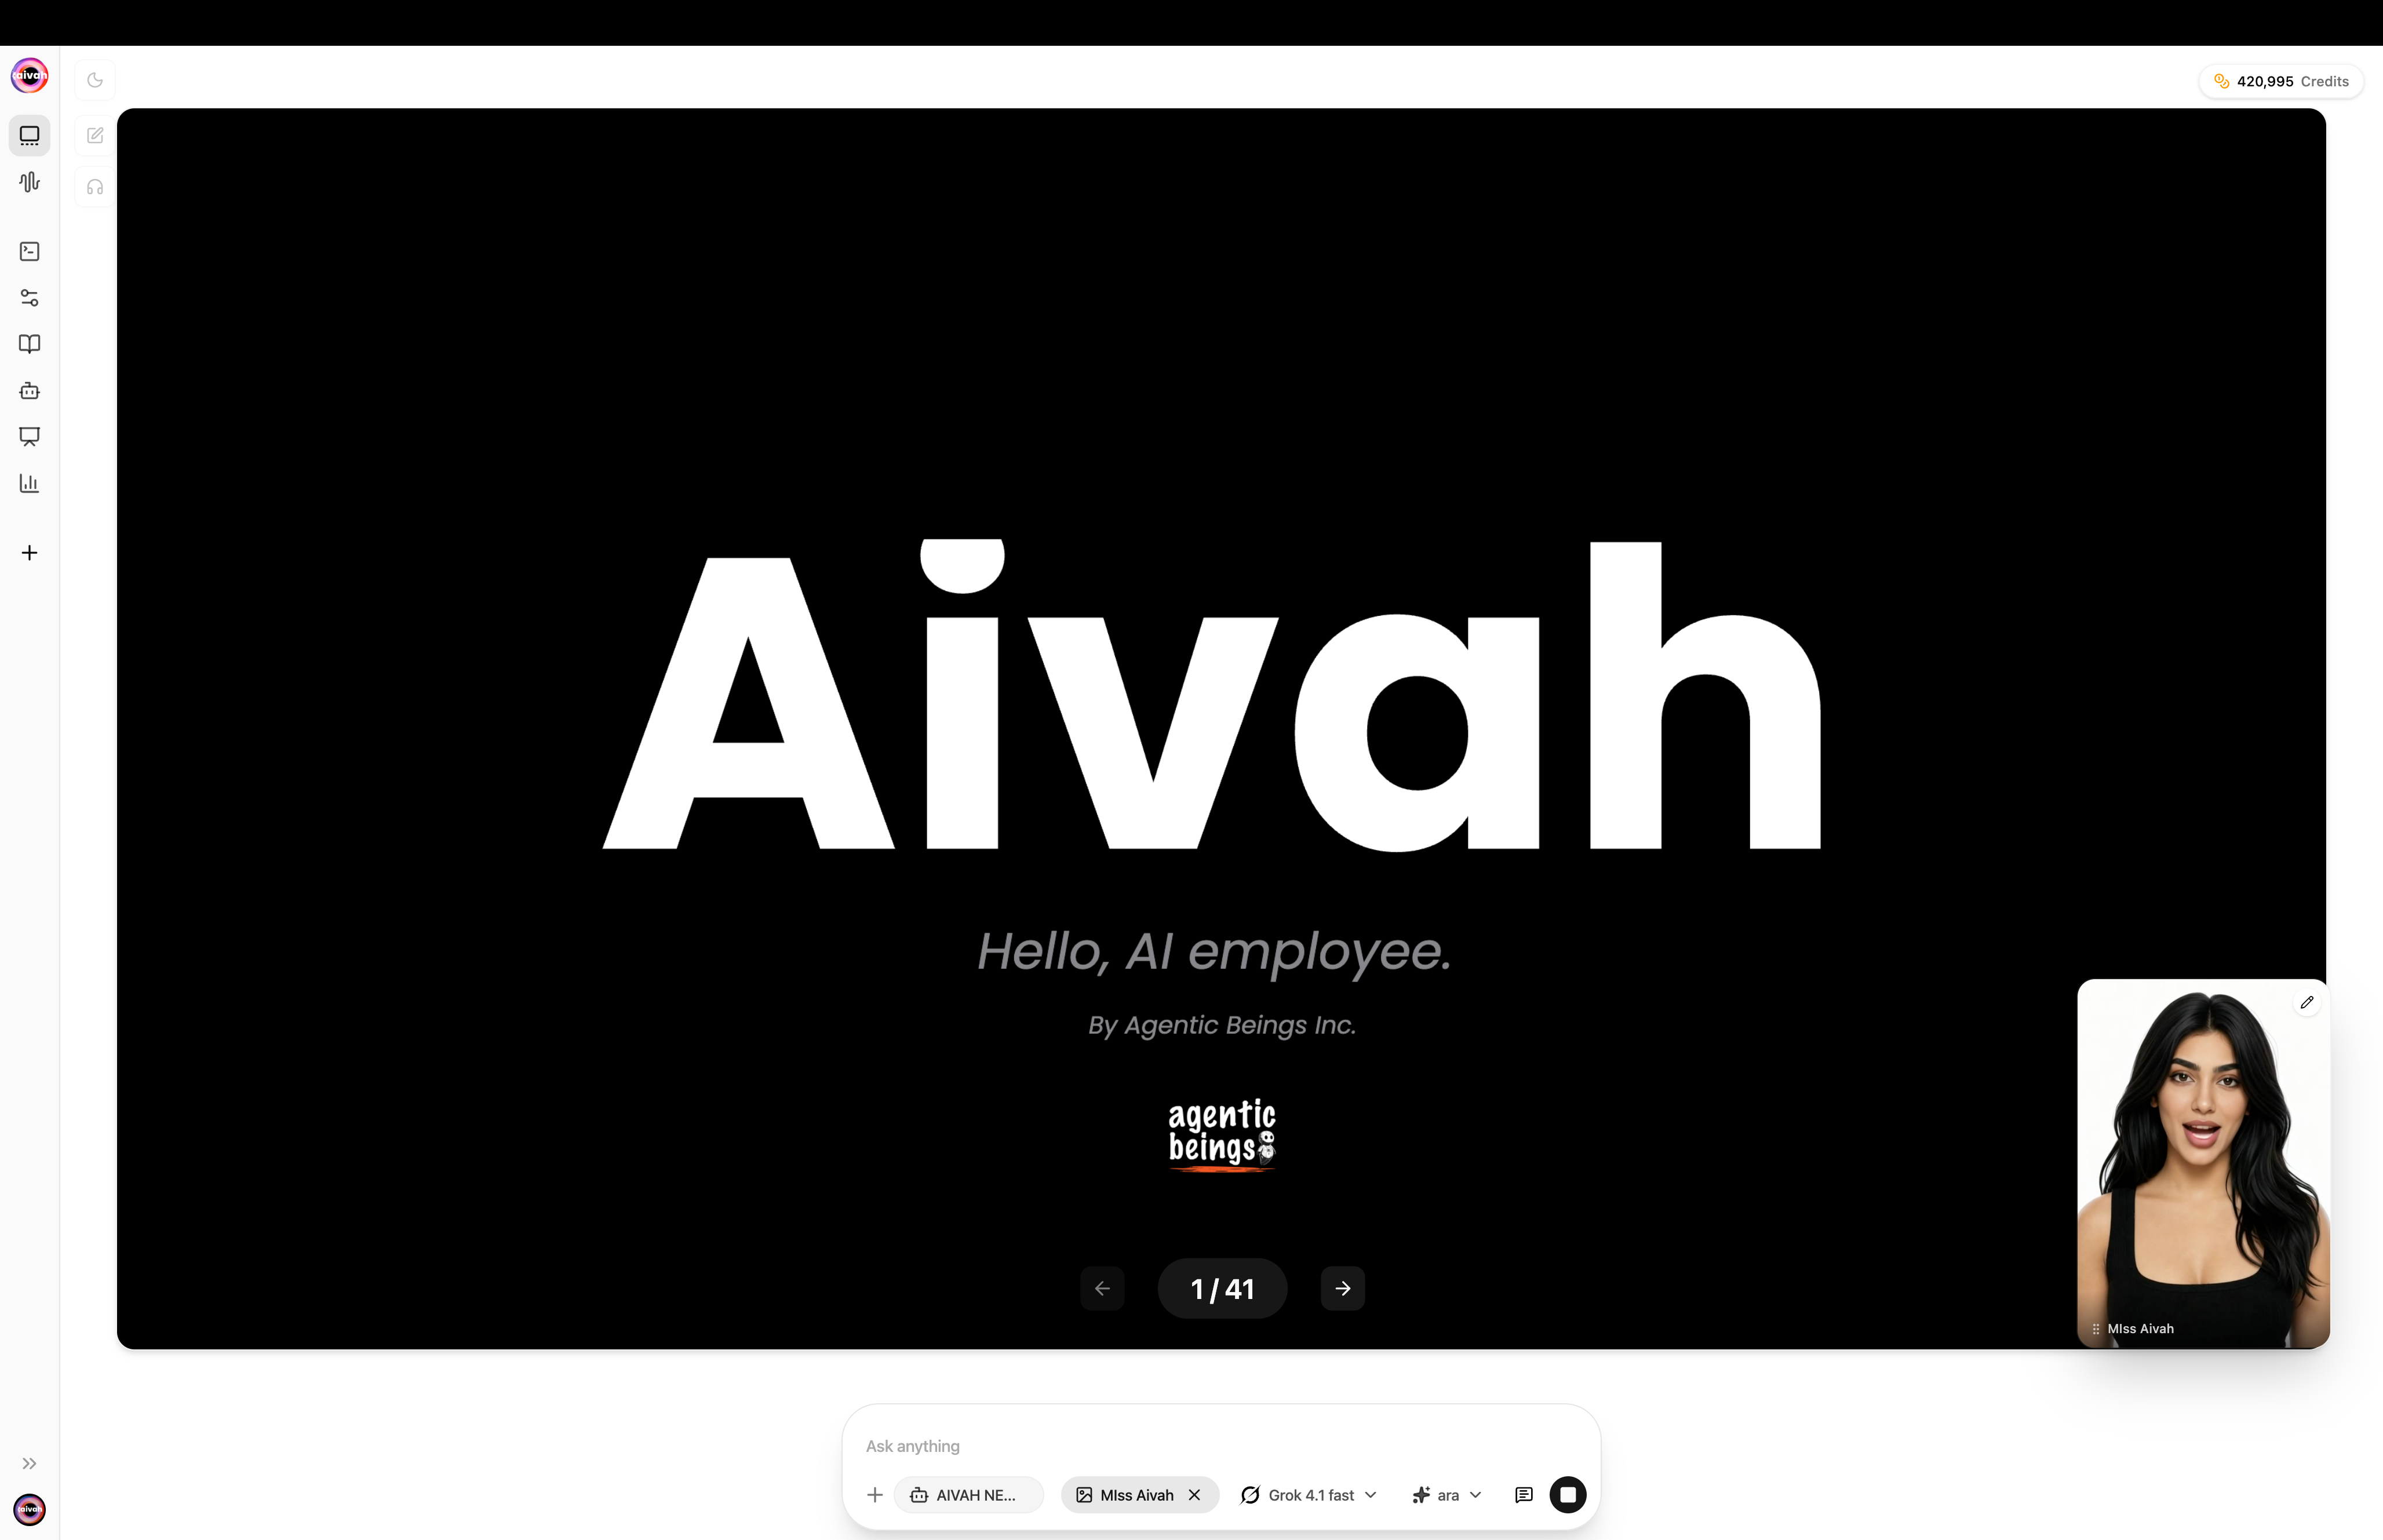
Realtime Interactive Presenter Agents transform a single PDF deck (or a single video) into an interactive experience. Instead of clicking through slides, audiences can ask questions, jump to chapters, take a built-in Quiz, and get tailored explanations in real time.What Makes a Presenter Agent Different?
- Single document focus – One uploaded PDF or video anchors the entire conversation.
- Guided navigation – Users can request summaries, ask for the next slide, or revisit earlier sections.
- Context awareness – The agent understands slide order and their relationships, keeping answers on-track.
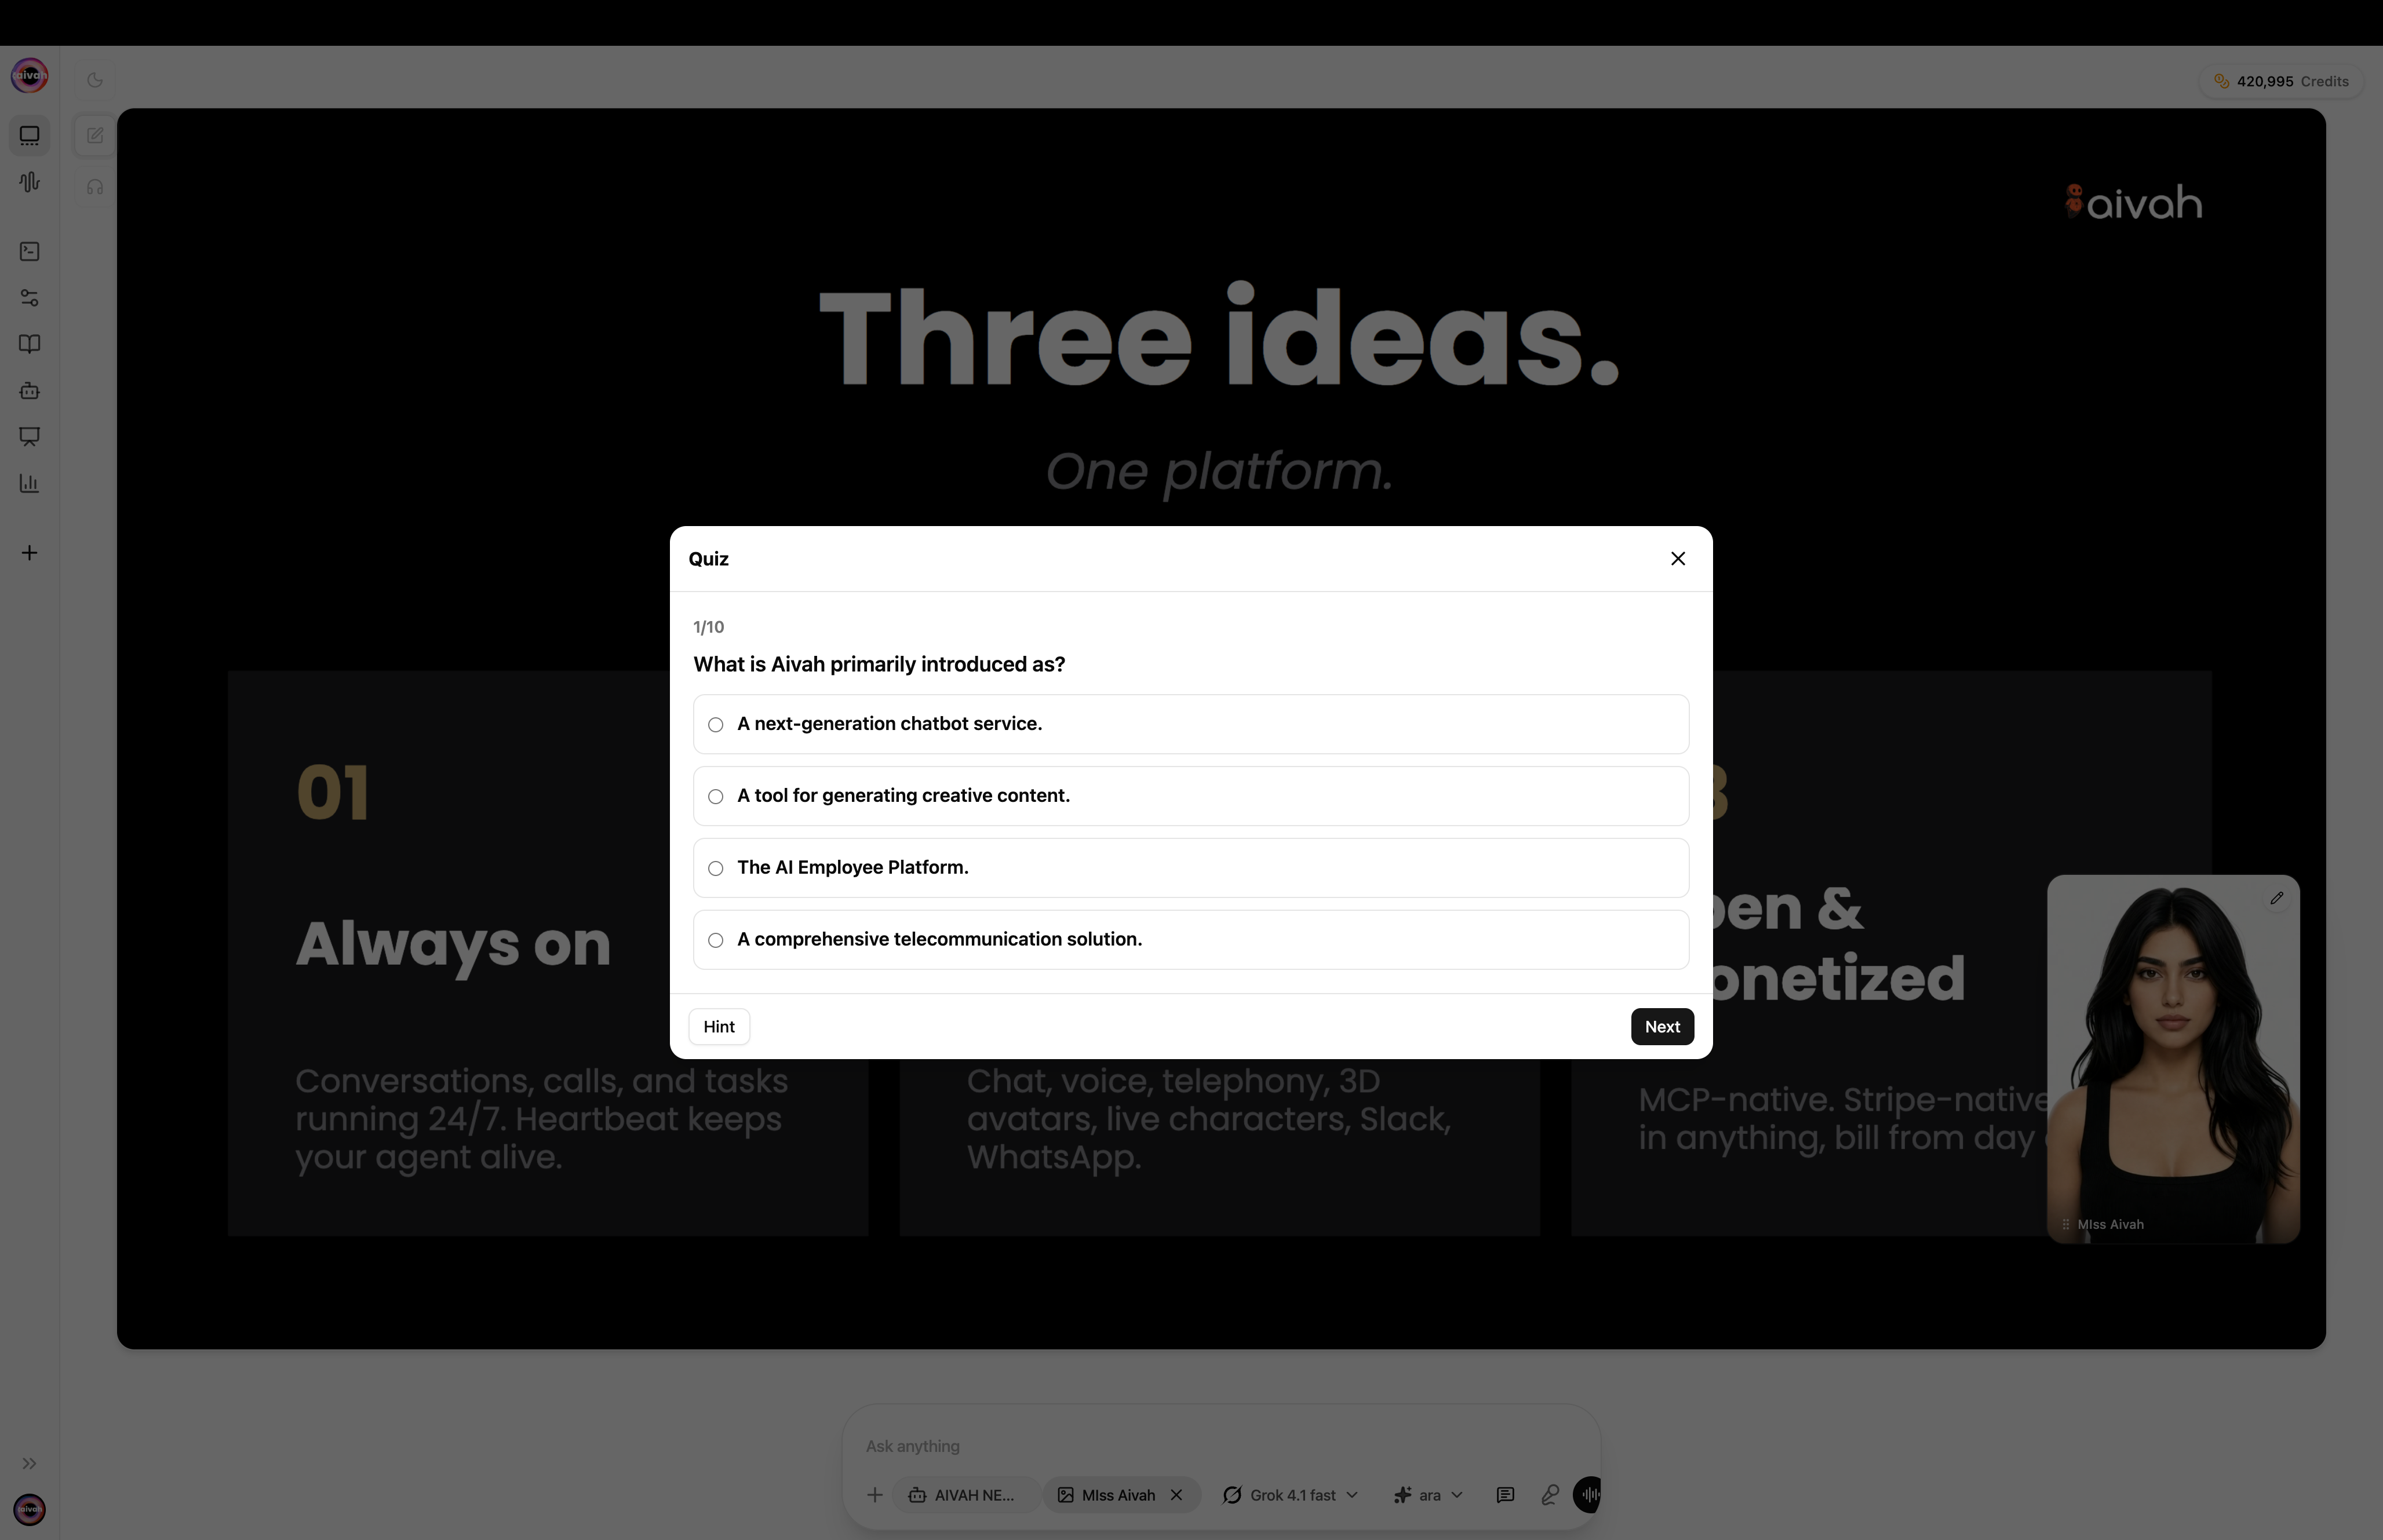
- Built-in Quiz – Multiple-choice questions defined for the presenter agent are exposed as a floating Quiz overlay in Avatar chat.
- Always on-brand – Deliver consistent demos and trainings without relying on a live presenter.
Conversational Slides
Navigate decks through natural language instead of manual slide controls.
Instant Recaps
Generate quick summaries for any slide or section within the deck.
Audience Q&A
Field questions as they arise while staying grounded in the uploaded content.
Consistent Delivery
Keep messaging uniform across every presentation and channel.
When to Choose a Presenter Agent
Sales and Marketing
Sales and Marketing
- Product demos and discovery calls
- Proposal walkthroughs
- Event or campaign recaps
Enablement and Training
Enablement and Training
- Employee onboarding decks
- Compliance refreshers
- Certification prep
Executive and Investor Updates
Executive and Investor Updates
- Strategy briefings
- Board presentations
- Quarterly reports
Create a Realtime Interactive Presenter Agent
Open the Agents Workspace
Navigate to Agents in the side navigation (
/agents) and click the Plus (+) icon to open /agents/create.Name and Configure
- Enter a descriptive name (e.g., “Product Demo Presenter”, “Compliance Training Deck”). The name becomes the slug (
@product-demo-presenter). - Turn the Presenter toggle on to switch from a knowledge-base agent to a presenter configuration.
- Write an Agent prompt and a Persona to set tone and behaviour.
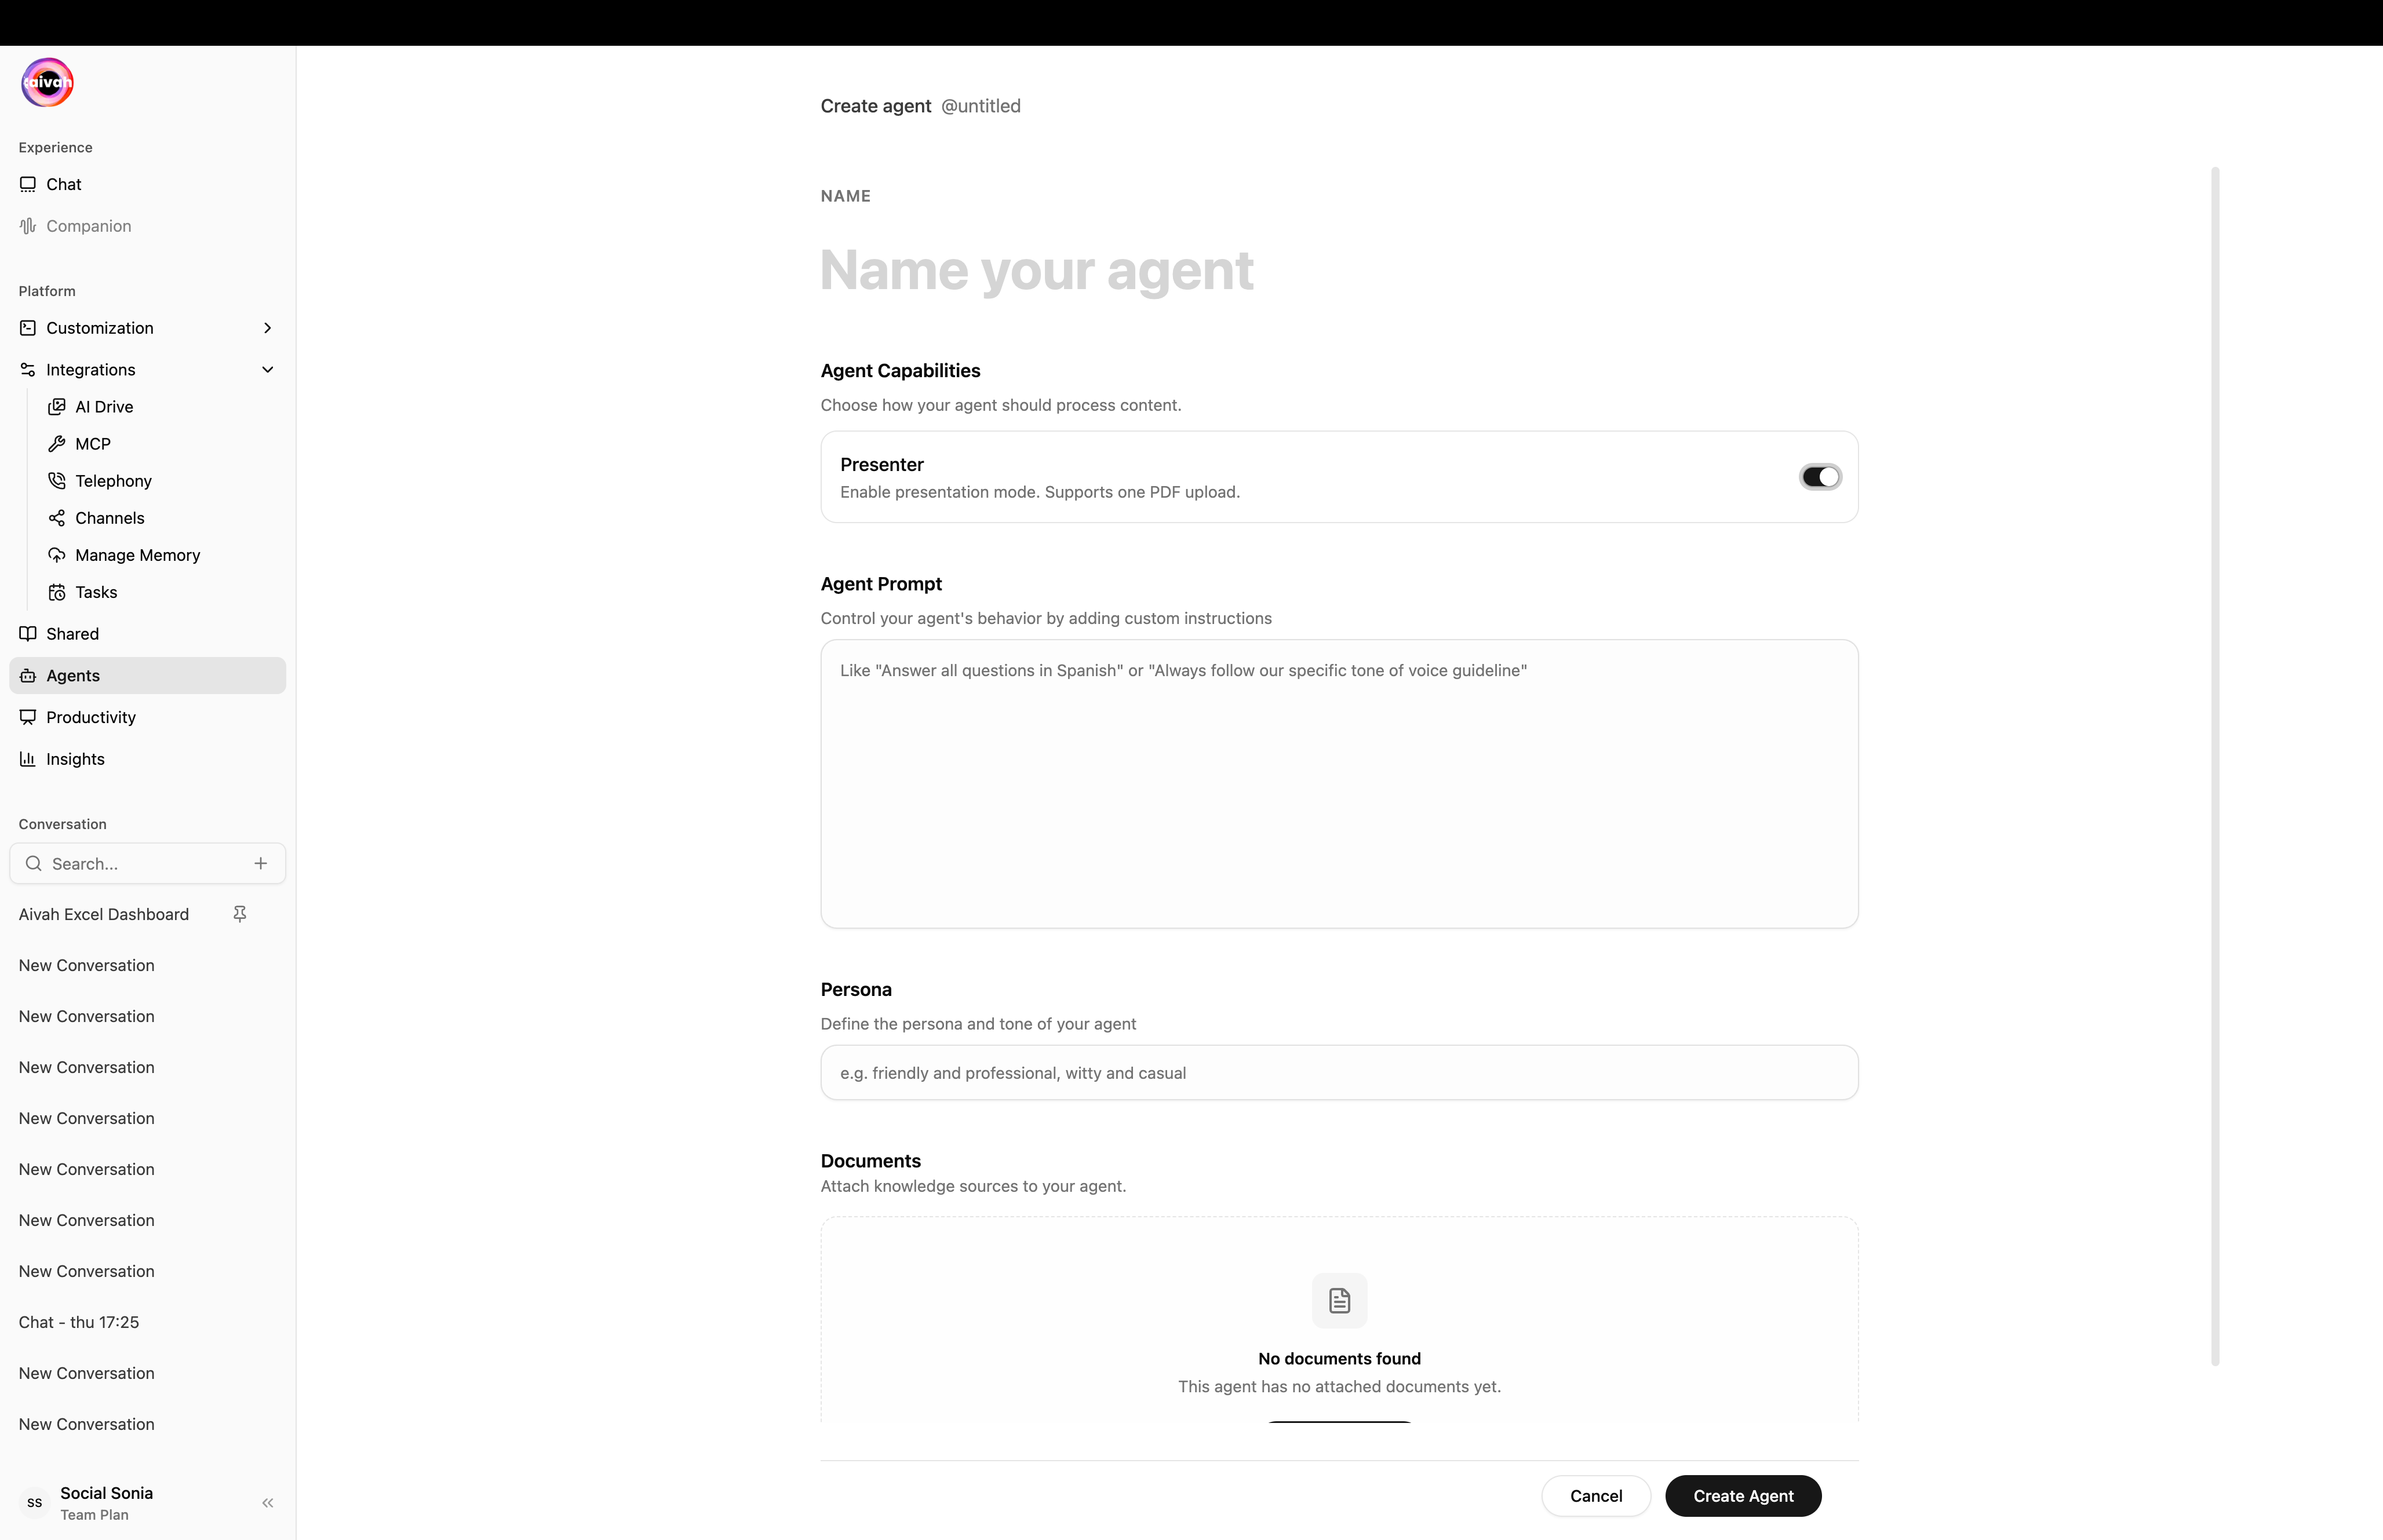
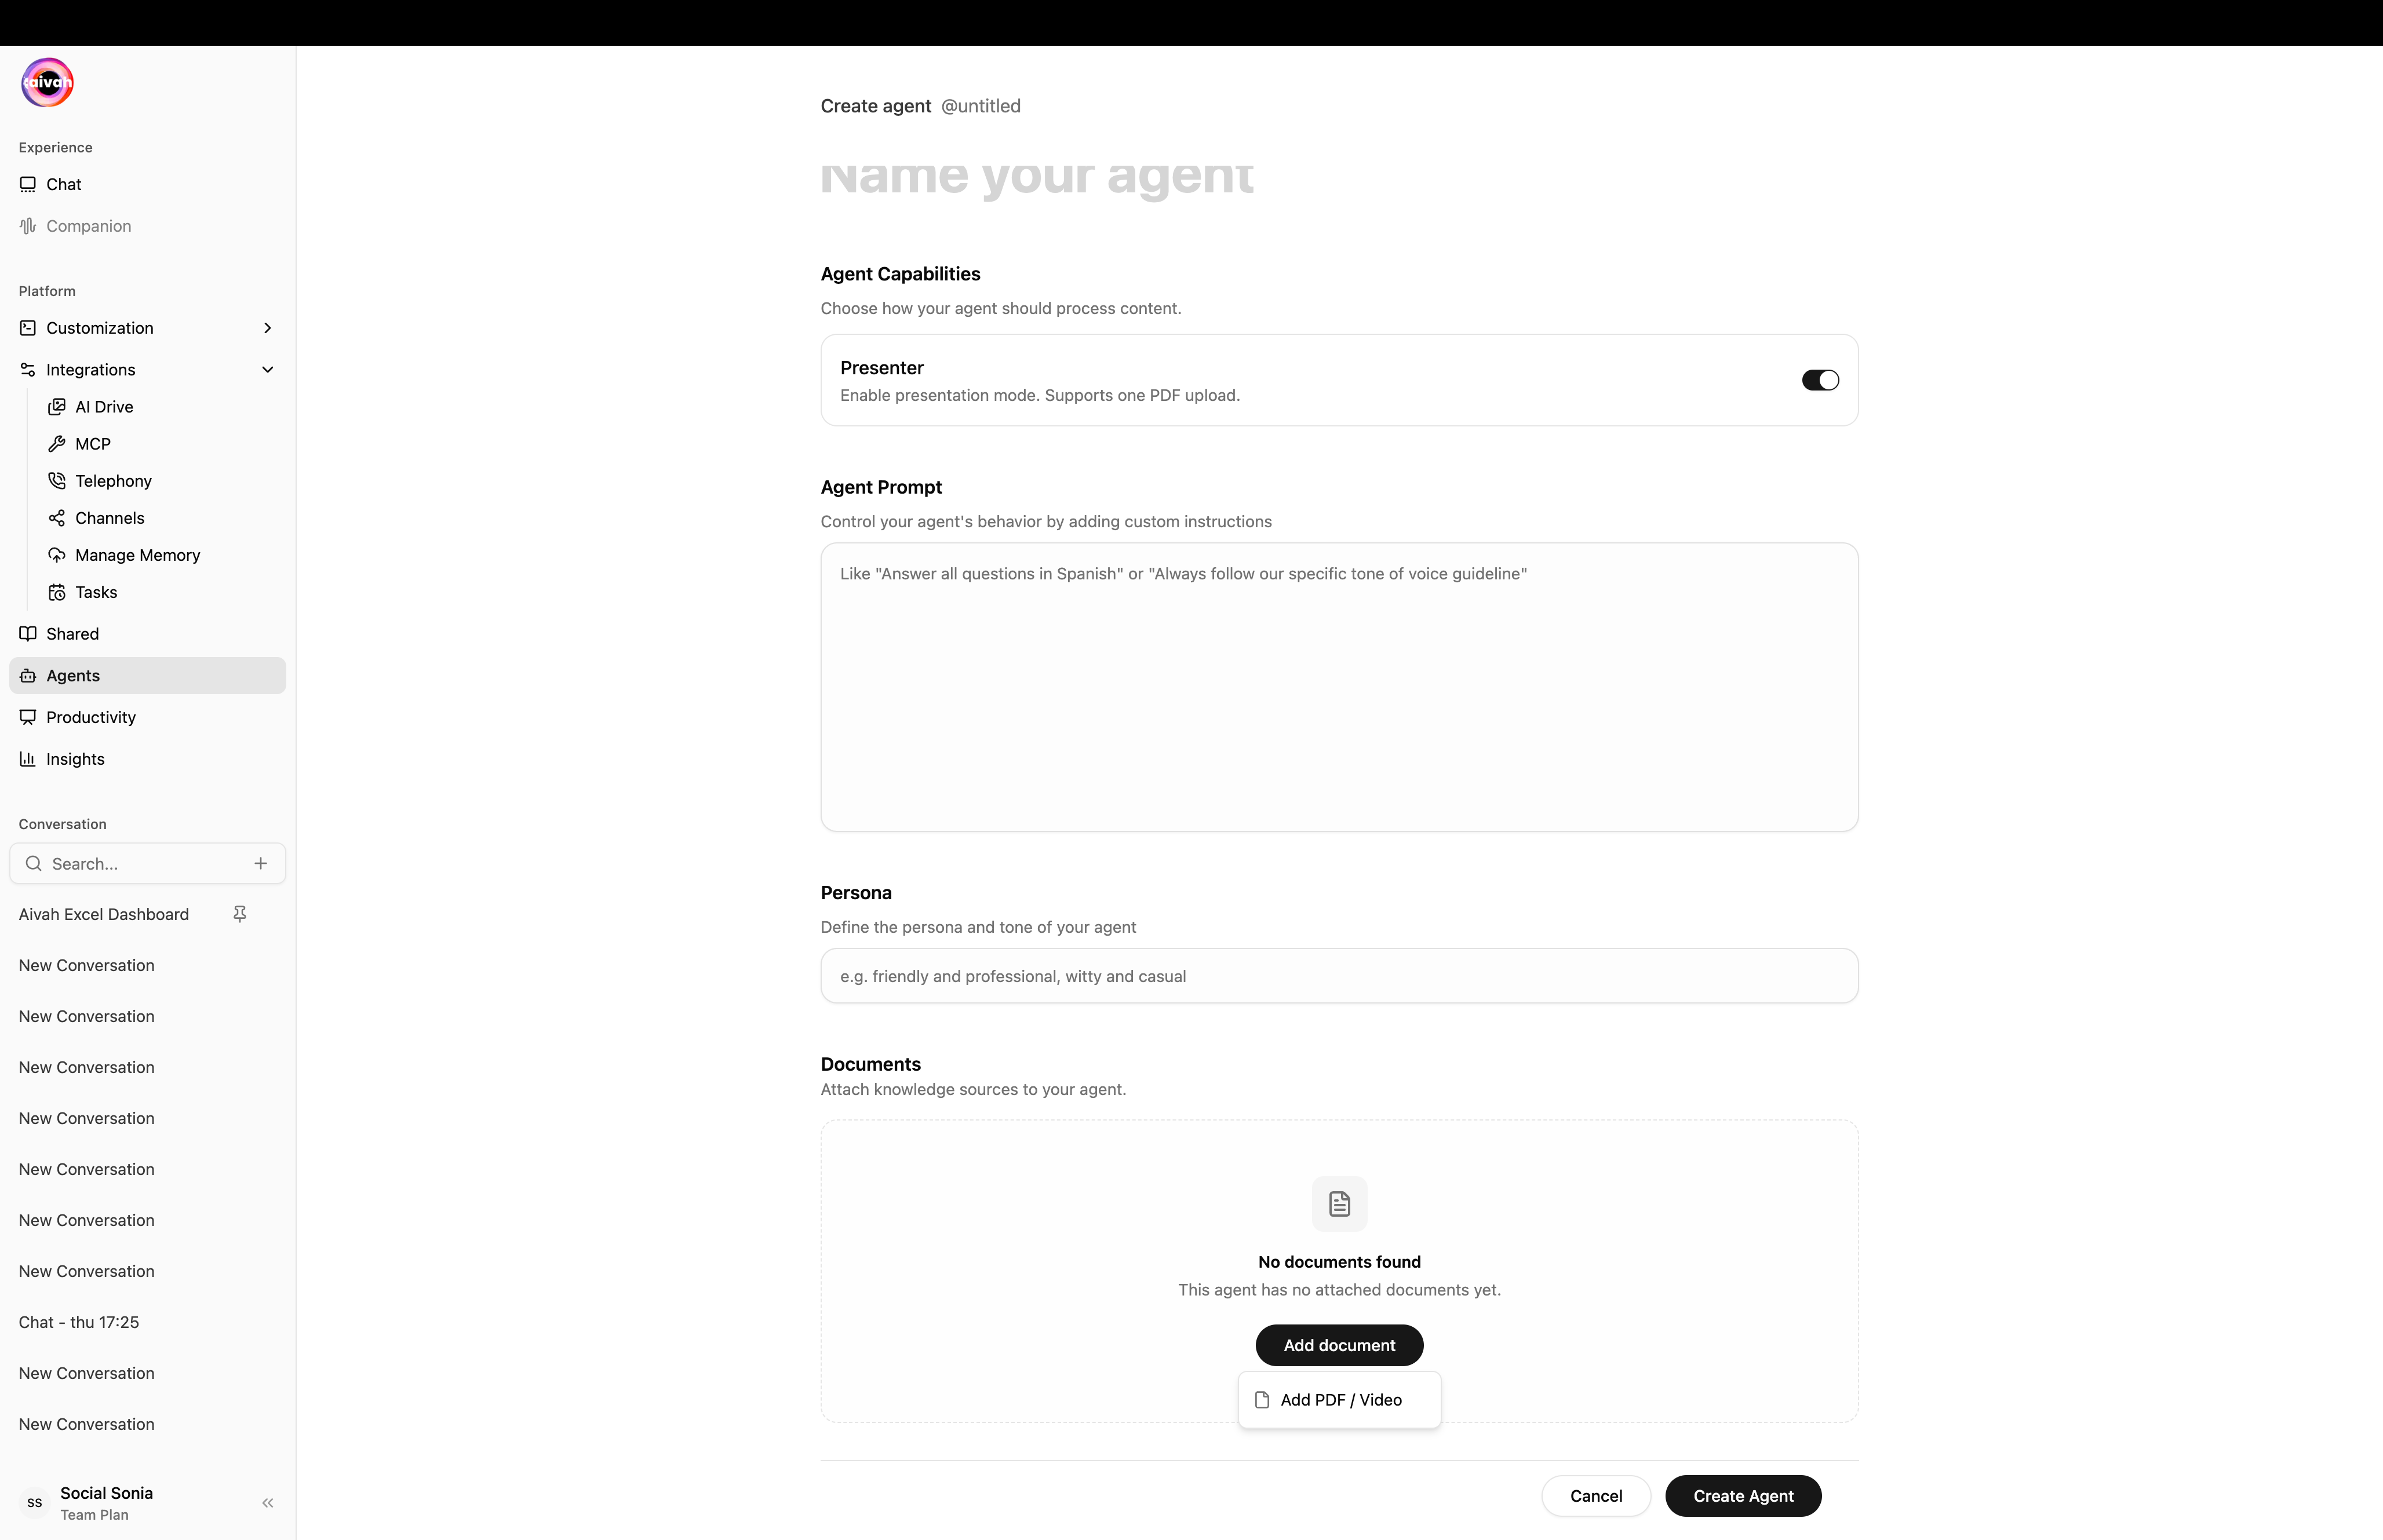
Upload the Deck
- Open the Add document dropdown. For presenter agents you only see the Add PDF / Video option.
- Add your PDF (or a single video). Wait for the confirmation message: “Document uploaded successfully. Delete the existing document to upload a new one.”
- Click Create agent to publish.


Optimize Your Presentation File
- Document Checklist
- Storytelling Tips
- Export to PDF with selectable text (avoid image-only slides).
- Use clear slide titles and headings.
- Keep slide numbers visible for easy references.
- Ensure charts and visuals include captions or supporting text.
Manage Presenter Content
Access Agent Settings
Open the Agents workspace, select your presenter agent, and view the Presentation panel.
Presenter Agents do not accept additional knowledge sources. For multi-document experiences, create a knowledge-base agent instead (toggle Presenter off when creating the agent).
Using the Quiz Overlay
When you talk to a Presenter Agent in Avatar chat, a Quiz icon appears in the floating toolbar next to the chat composer. Click it to:- Step through multiple-choice questions defined on the agent’s content
- Check answers without leaving the conversation
- Use the Hint button when stuck, then Next to progress
- Re-open the overlay any time during the session
/agents) so you can preview the quiz outside of a live chat.
Delivering a Great Experience
- Rehearse navigation prompts so you know how the agent references each slide.
- Prepare likely questions and validate the responses stay aligned with your narrative.
- Pair with knowledge-base agents when you need deeper knowledge or integrations beyond the deck.
- Monitor Insights to see which slides and questions resonate most with audiences.
Troubleshooting
Upload stalls or fails
Upload stalls or fails
Confirm the PDF is not password-protected, stays under size limits, and contains selectable text.
Answers feel incomplete
Answers feel incomplete
Add supporting context or summary bullets to the relevant slides before re-uploading. The agent relies on the information in the document.
Need multiple documents
Need multiple documents
Create a knowledge-base agent instead (toggle Presenter off when creating), or link multiple presenter agents together using share links.