> ## Documentation Index
> Fetch the complete documentation index at: https://opinionai.mintlify.site/llms.txt
> Use this file to discover all available pages before exploring further.
# Overview
> Publish your AI agents to a public URL with a built-in lead form
# Share Your AI Agents
The **Shared** workspace (`Side nav → Shared`, or `/shared`) lets you publish an agent to a **public link** that anyone can chat with – no Aivah account required.
Use it for:
* **Public demos** of a new product or content drop
* **Embedded support assistants** on your marketing site
* **Lead generation** with the built-in lead capture form
* **Voice-first deployments** that work without a visual UI
## Browse published agents
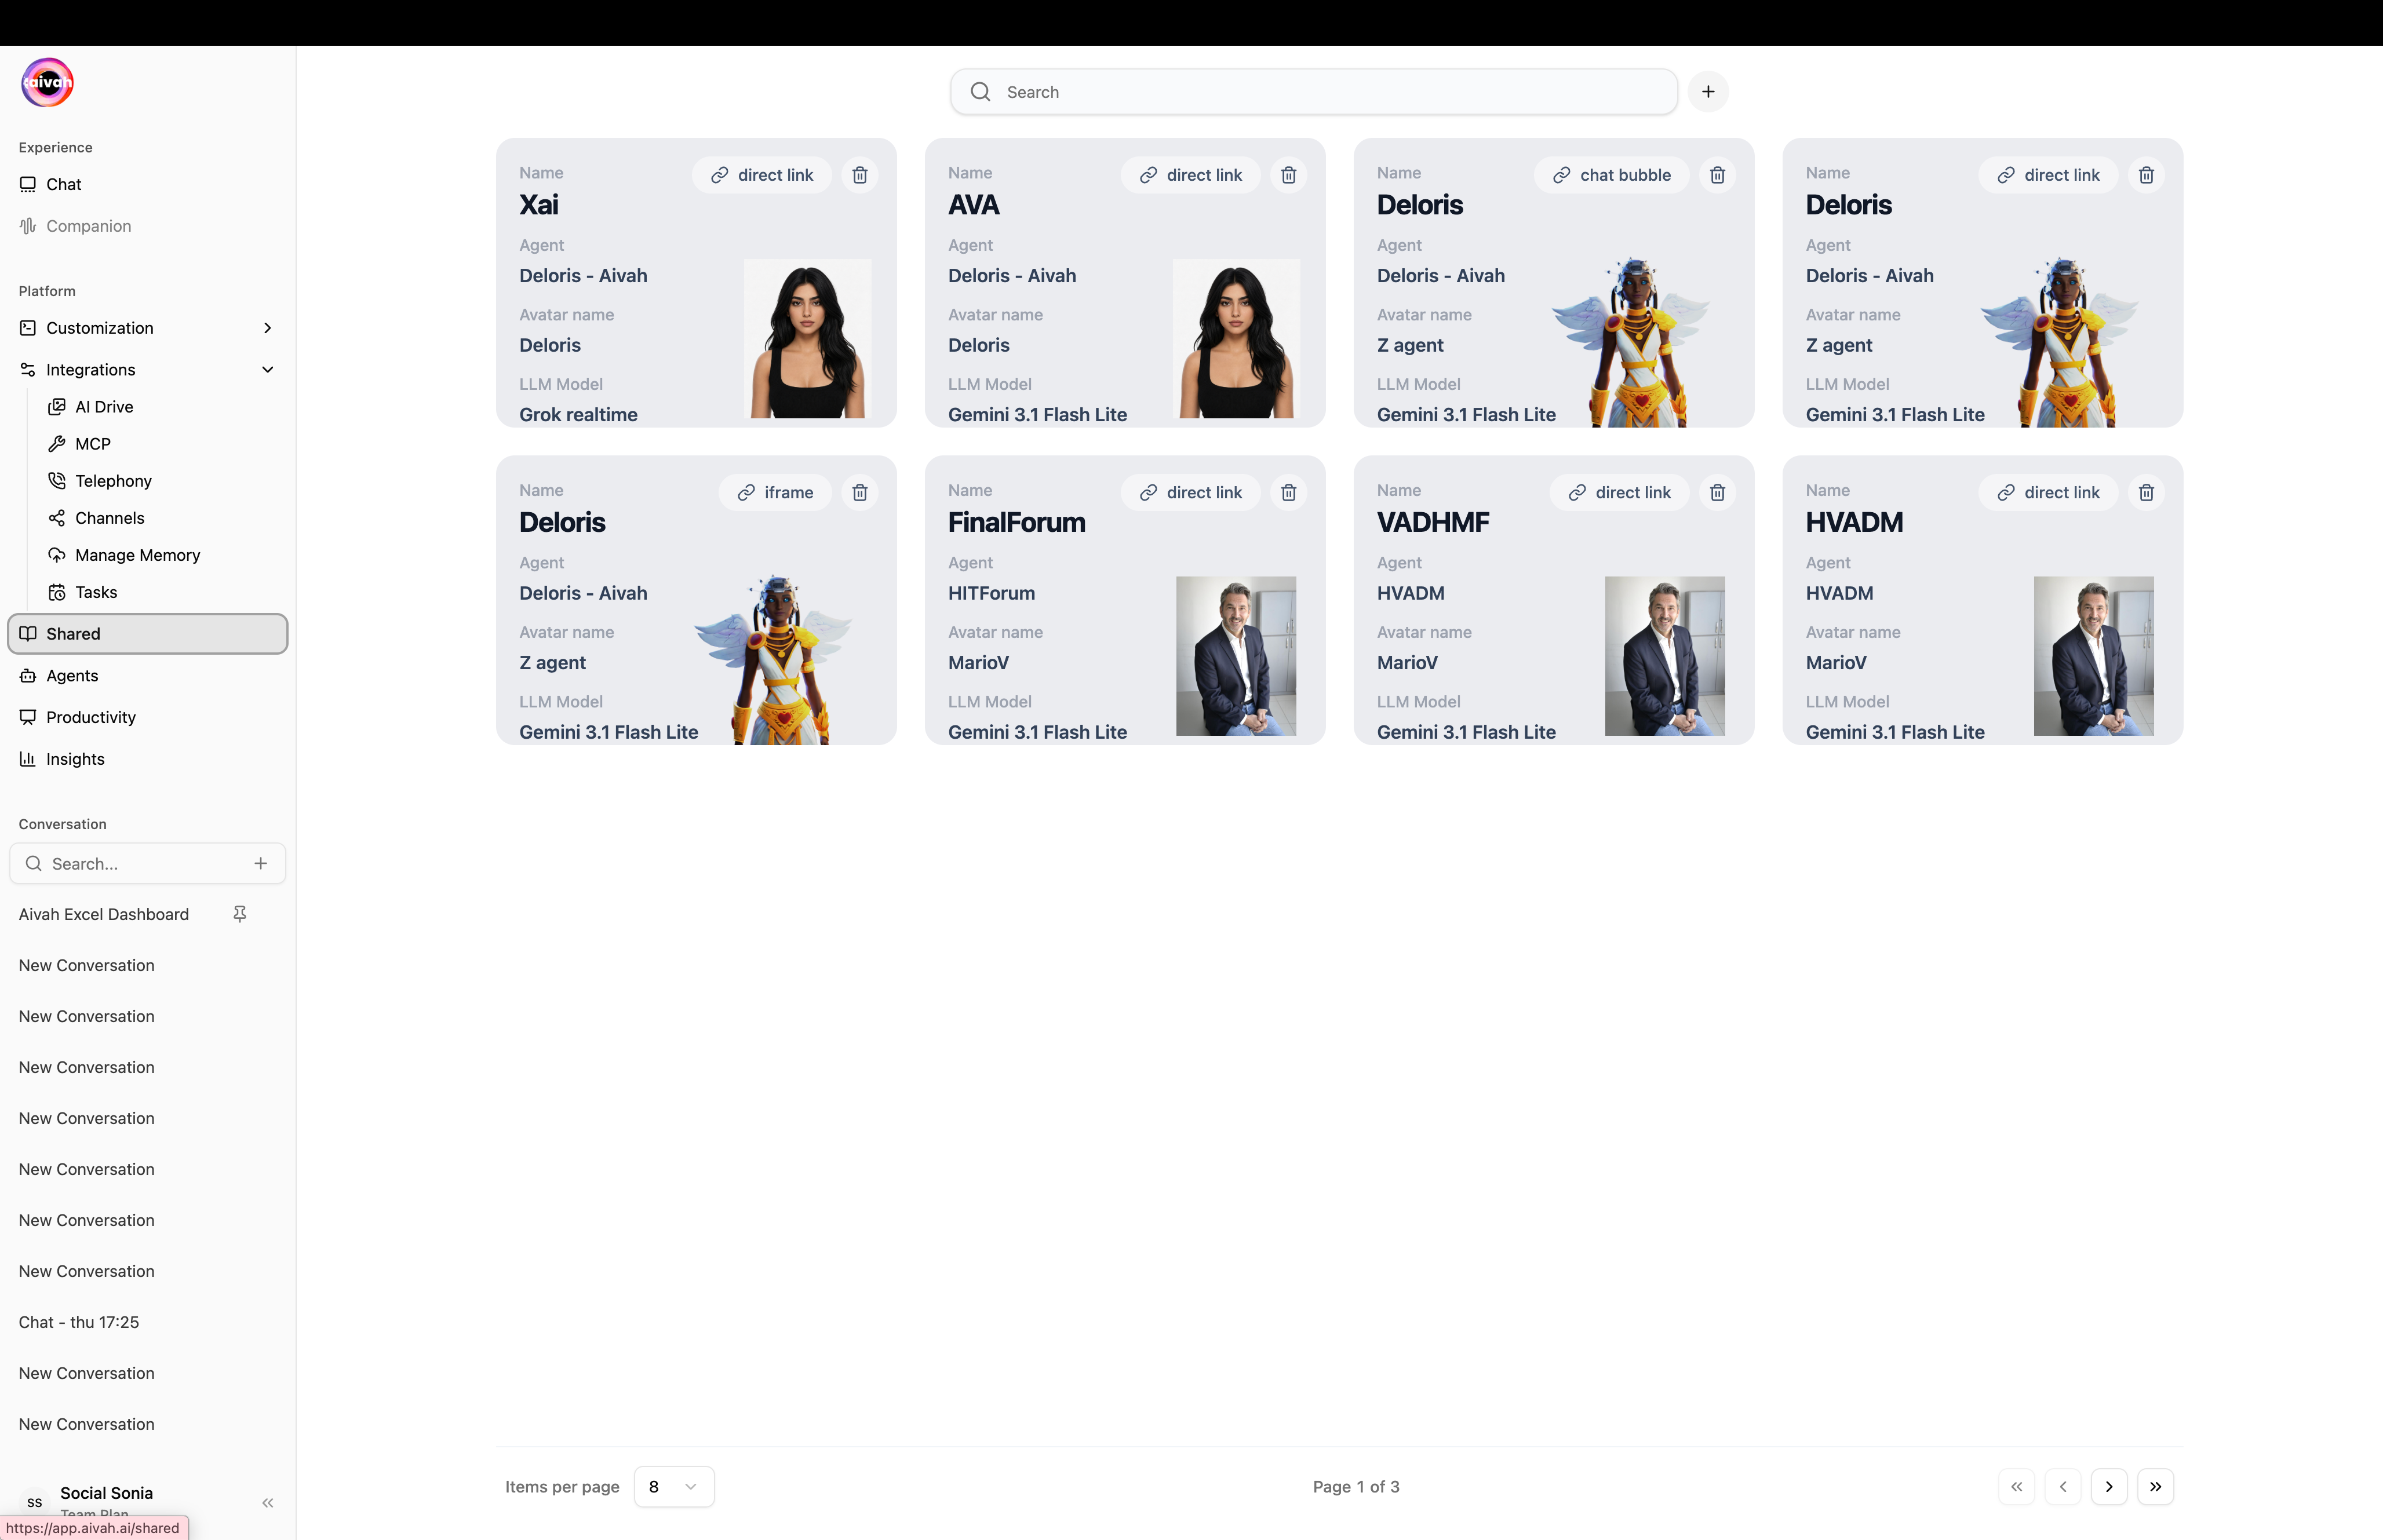
The Shared list mirrors the regular avatar grid:
* Searchable
* Paginated
* Click any card to see details
* Each card shows the underlying agent, its current public link, and a copy button
 ## Create a Shared Link
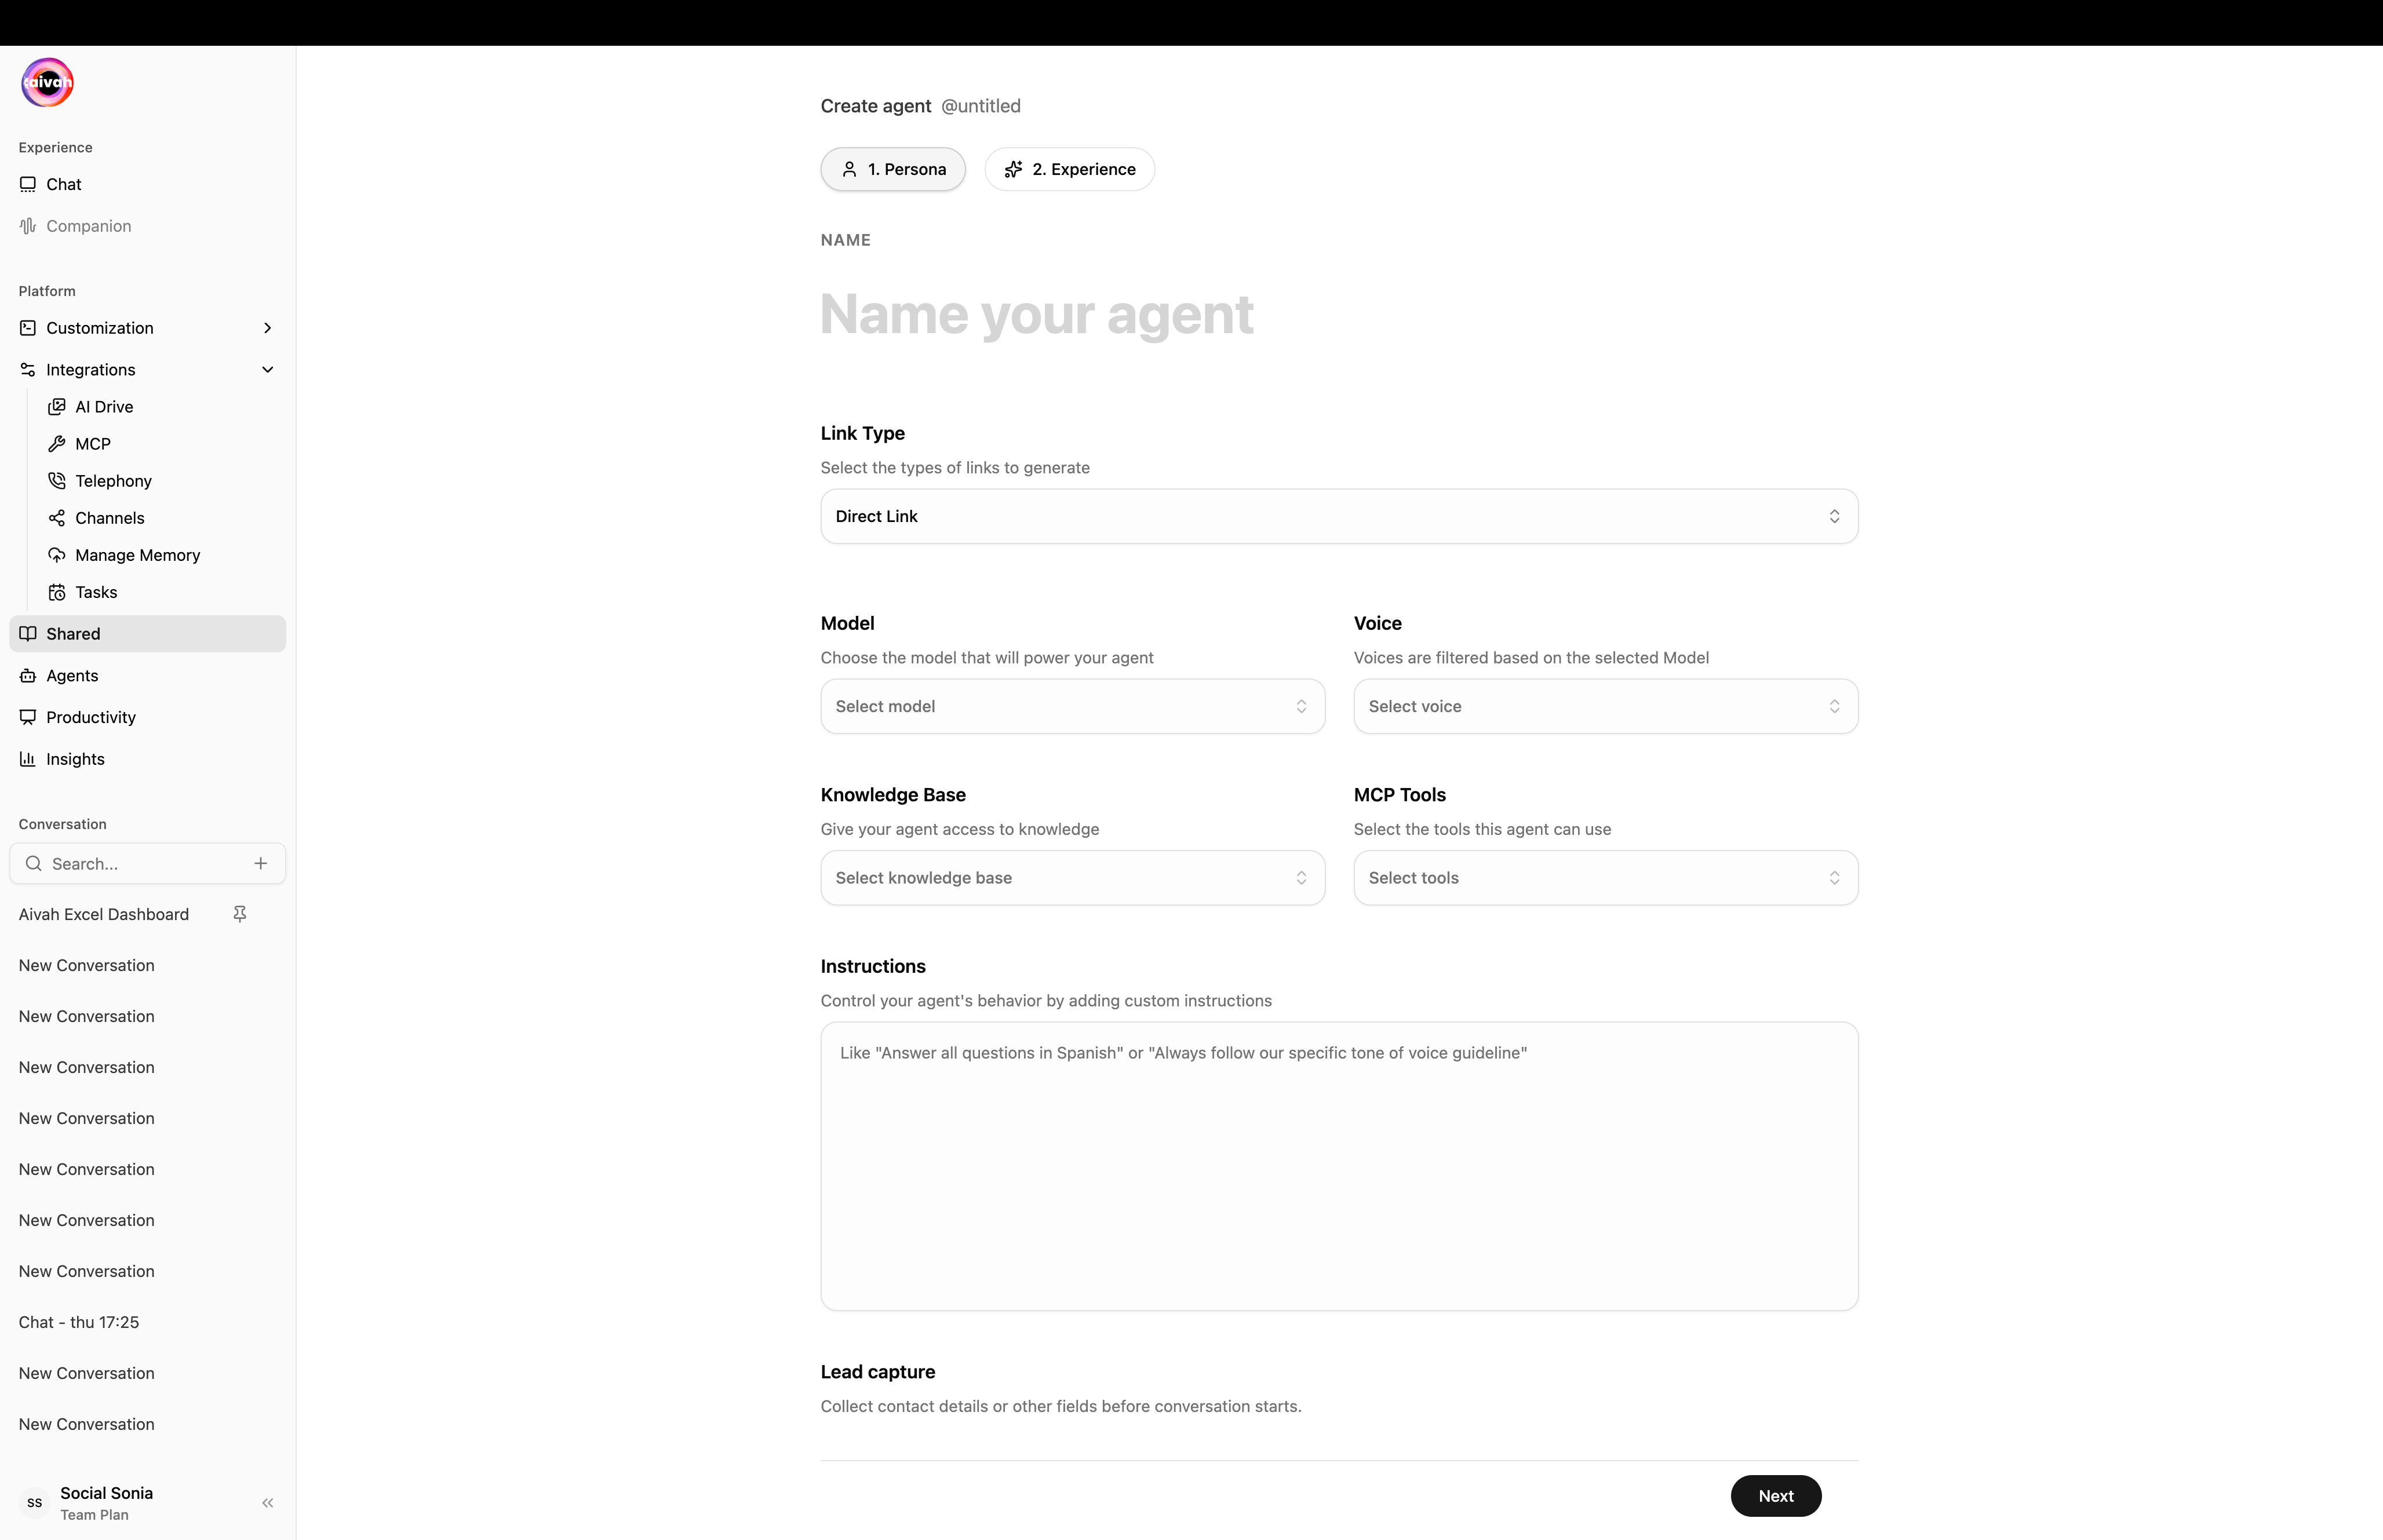
Click the **+** icon in the Shared header to open `/shared/create`. The form has two steps – **Persona** and **Experience**.
Set the agent name, **Link Type** (Direct Link / Iframe / Chat Bubble), the **Model**, the **Voice** (filtered by Model), a **Knowledge Base**, optional **MCP Tools**, and freeform **Instructions**.
## Create a Shared Link
Click the **+** icon in the Shared header to open `/shared/create`. The form has two steps – **Persona** and **Experience**.
Set the agent name, **Link Type** (Direct Link / Iframe / Chat Bubble), the **Model**, the **Voice** (filtered by Model), a **Knowledge Base**, optional **MCP Tools**, and freeform **Instructions**.
 Add the fields you want to capture (name, email, phone, custom). For each field:
* Mark as required or optional
* Re-order fields with drag-and-drop
* Remove fields that don't apply
See the [Lead Capture Forms](/share/lead-capture-form) guide for the full flow.
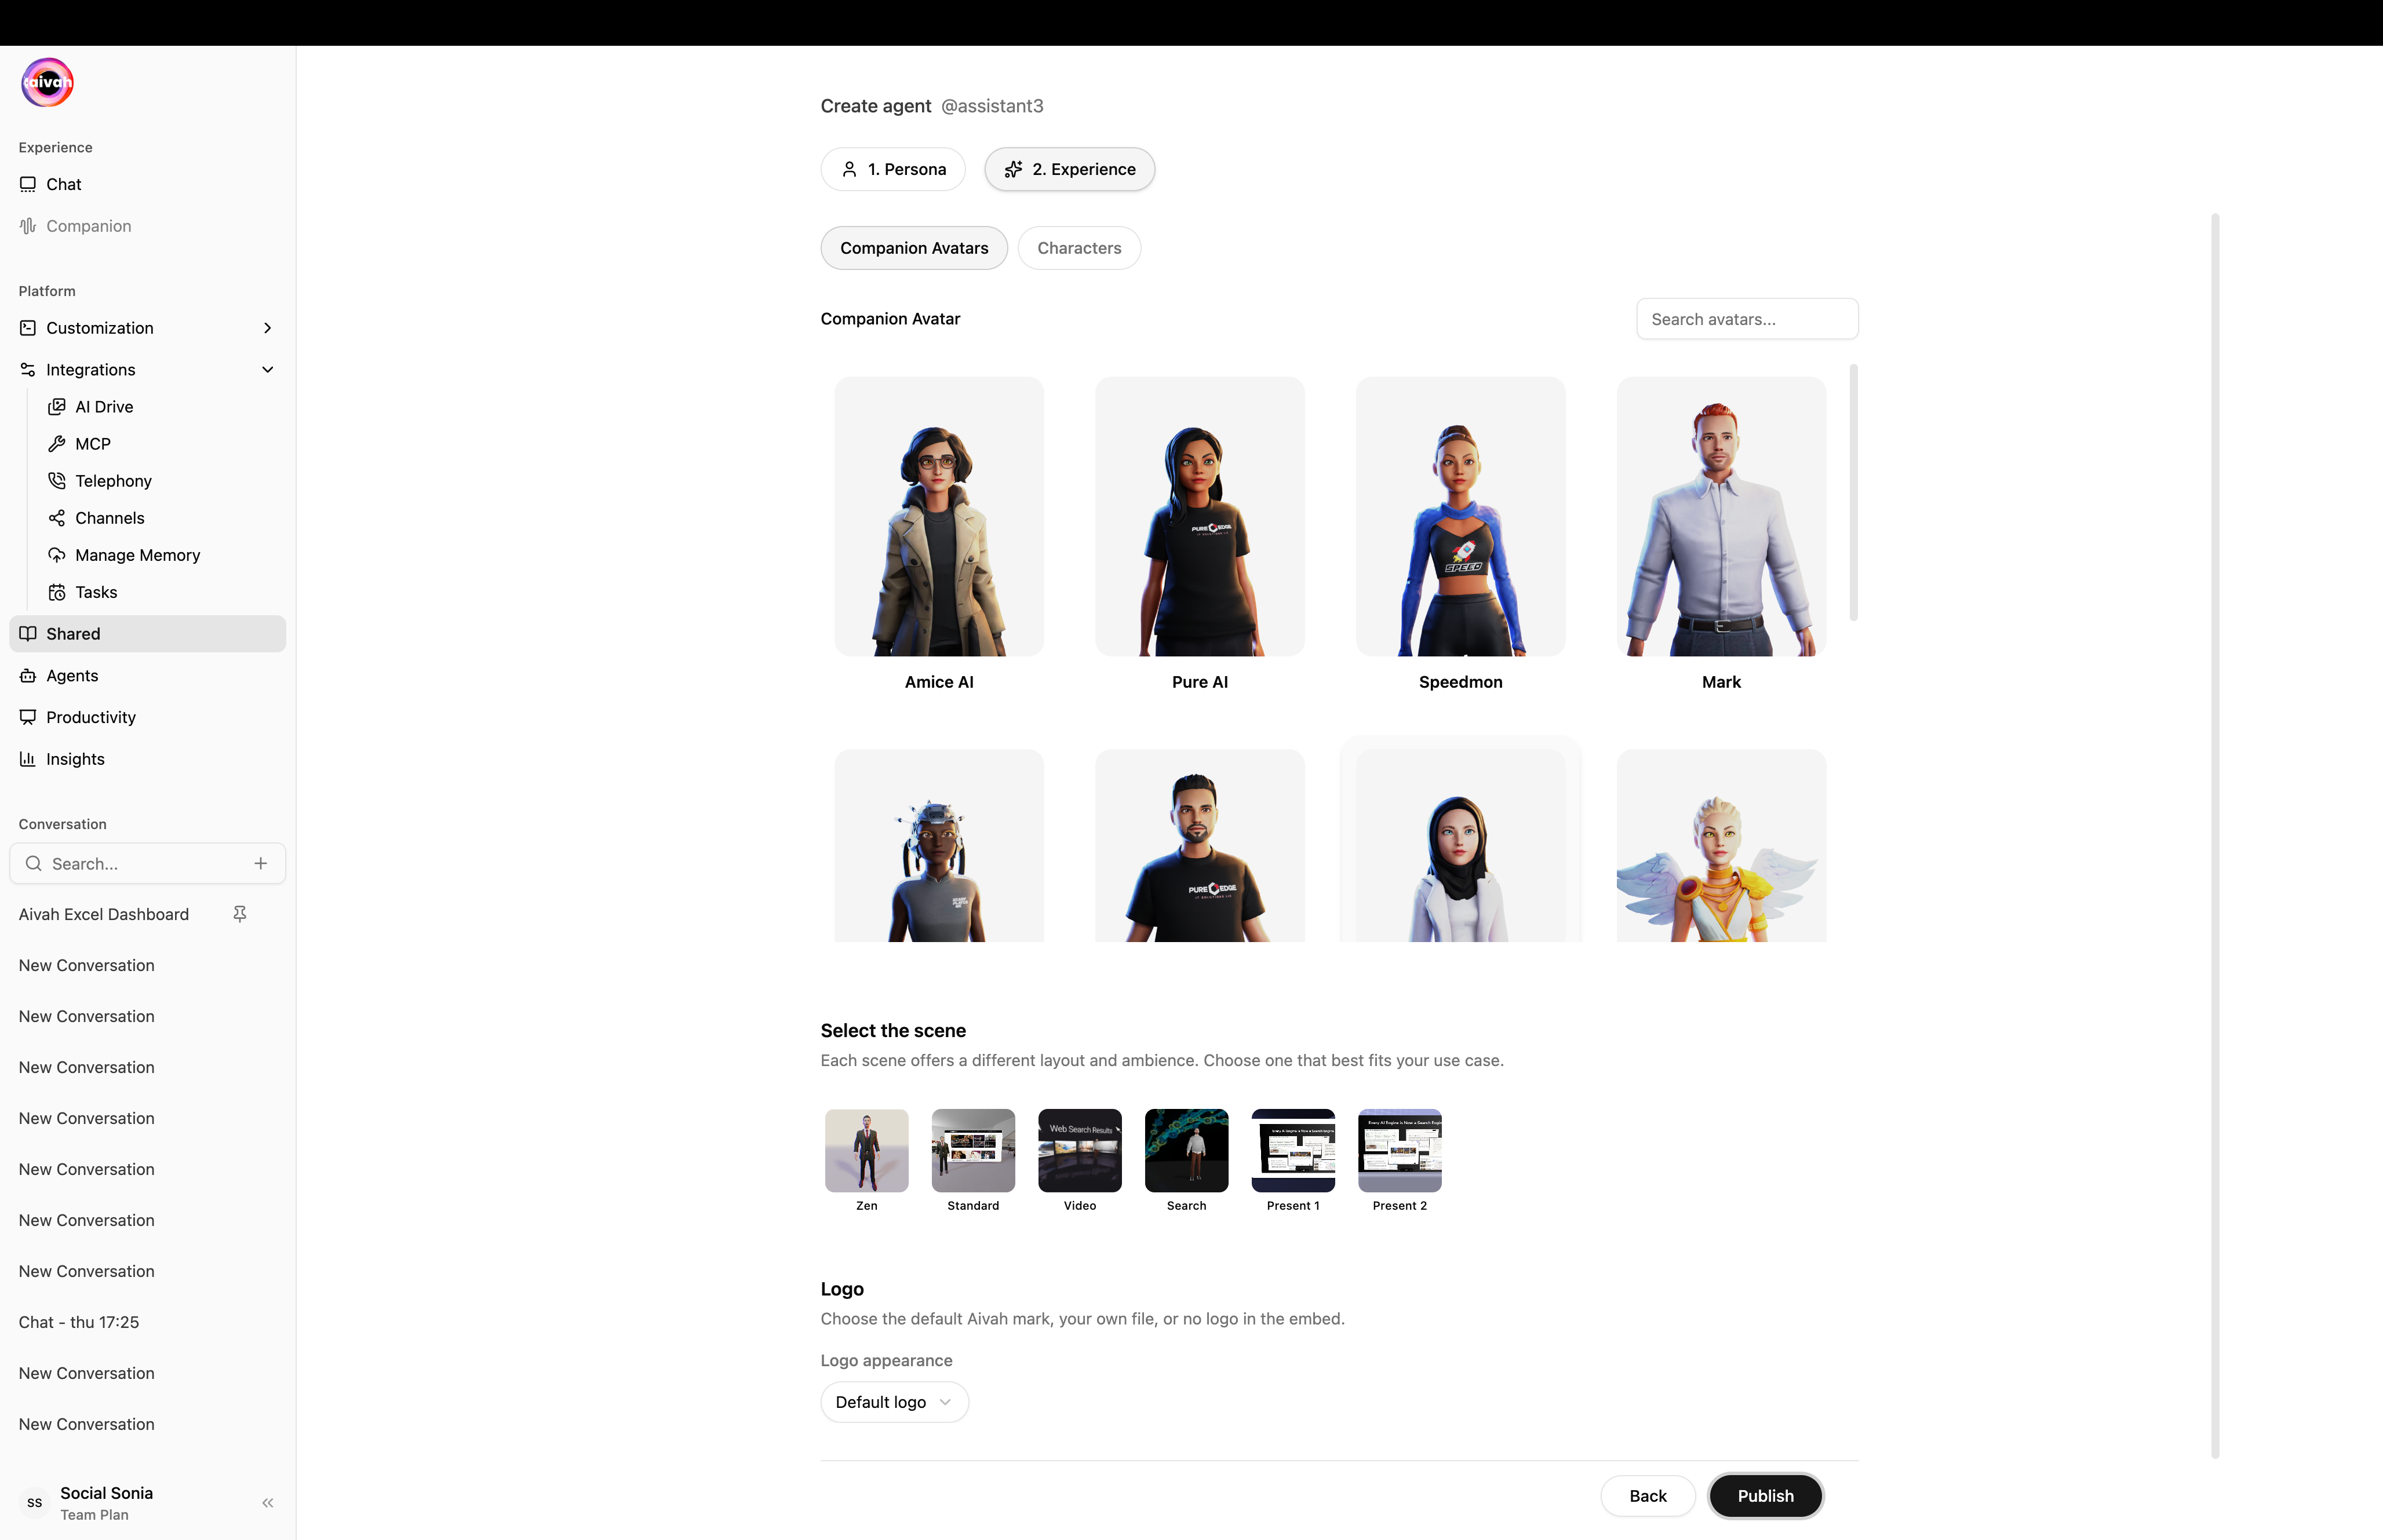
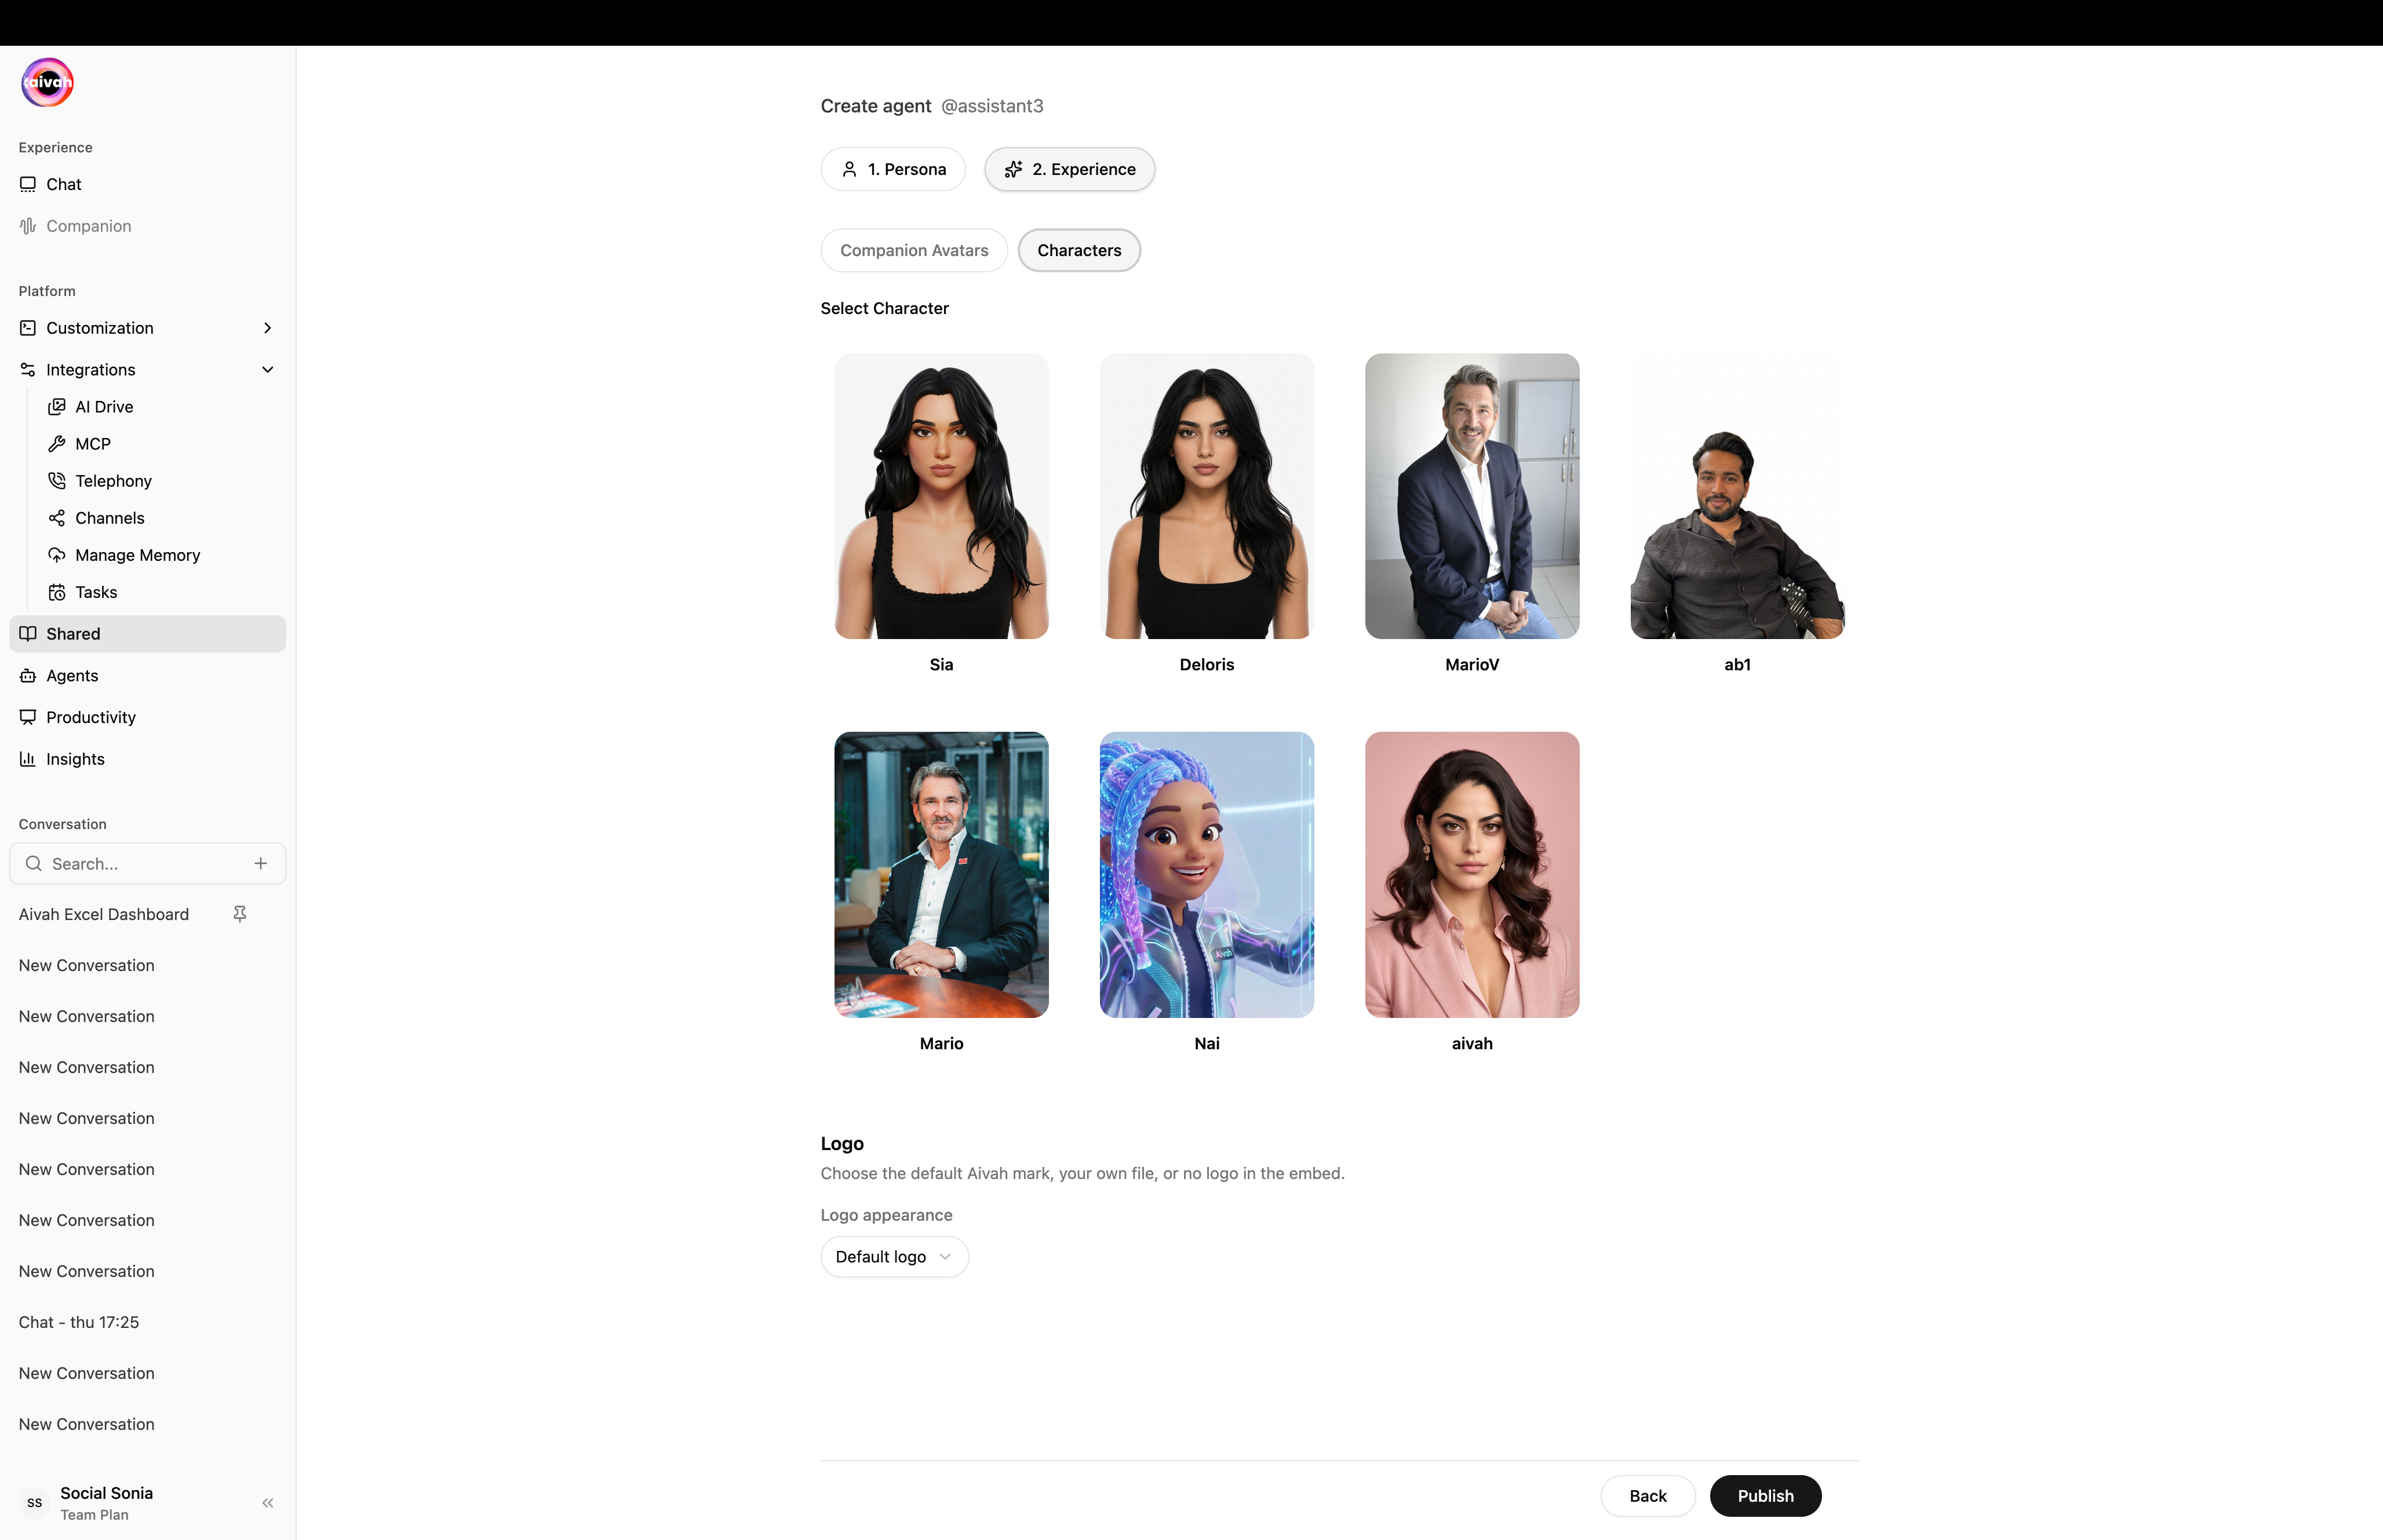
On the **Experience** tab, choose a Companion Avatar or a Character, pick a scene, and decide what logo to show in the embed (Default Aivah mark, your own upload, or no logo).
Add the fields you want to capture (name, email, phone, custom). For each field:
* Mark as required or optional
* Re-order fields with drag-and-drop
* Remove fields that don't apply
See the [Lead Capture Forms](/share/lead-capture-form) guide for the full flow.
On the **Experience** tab, choose a Companion Avatar or a Character, pick a scene, and decide what logo to show in the embed (Default Aivah mark, your own upload, or no logo).
 Click **Publish**. Aivah generates a public URL plus a copy-ready embed snippet. The agent now appears in the Shared list.
## Manage / Unpublish
From the Shared list you can:
* **Copy** the public link with one click
* **Edit** the lead form at any time
* **Unpublish** – the public link becomes inactive immediately
Submitted leads appear under [Insights → Leads](/insights/leads).
## Distribution Methods
Once an agent is published you can distribute it in three primary ways:
### 1. Direct Link
Share a simple URL that users can click to access your agent immediately. This is the quickest way to get your agent in front of users.
### 2. iFrame Embed
Embed your agent directly into websites using HTML iframe code. Perfect for integrating agents into existing websites or applications.
### 3. Chat Bubble
Add a floating chat bubble to any website that users can click to start conversations with your agent. This provides a non-intrusive way to offer AI assistance.
## Key Features
* **Agent Customization**: Configure agent behavior, appearance, and conversation flow
* **Lead Capture Form**: Built-in form with reorderable, required/optional fields
* **Voice Integration**: Enable voice-only interactions for hands-free experiences
* **Scene Selection**: Choose from multiple visual environments and backgrounds
* **Sharing Analytics**: Track usage and engagement metrics from the [Insights](/insights/overview) workspace
* **Multi-modal Support**: Support for text, voice, and visual interactions
## Getting Started
1. Configure your agent's behavior and appearance
2. Set up the [lead capture form](/share/lead-capture-form) if you want to collect contact info
3. Choose your preferred sharing method
4. Customize the user experience settings
5. [Publish and share](/share/publish) your agent
The Shared system provides a comprehensive platform for deploying AI agents with full control over the user experience and data collection.
Click **Publish**. Aivah generates a public URL plus a copy-ready embed snippet. The agent now appears in the Shared list.
## Manage / Unpublish
From the Shared list you can:
* **Copy** the public link with one click
* **Edit** the lead form at any time
* **Unpublish** – the public link becomes inactive immediately
Submitted leads appear under [Insights → Leads](/insights/leads).
## Distribution Methods
Once an agent is published you can distribute it in three primary ways:
### 1. Direct Link
Share a simple URL that users can click to access your agent immediately. This is the quickest way to get your agent in front of users.
### 2. iFrame Embed
Embed your agent directly into websites using HTML iframe code. Perfect for integrating agents into existing websites or applications.
### 3. Chat Bubble
Add a floating chat bubble to any website that users can click to start conversations with your agent. This provides a non-intrusive way to offer AI assistance.
## Key Features
* **Agent Customization**: Configure agent behavior, appearance, and conversation flow
* **Lead Capture Form**: Built-in form with reorderable, required/optional fields
* **Voice Integration**: Enable voice-only interactions for hands-free experiences
* **Scene Selection**: Choose from multiple visual environments and backgrounds
* **Sharing Analytics**: Track usage and engagement metrics from the [Insights](/insights/overview) workspace
* **Multi-modal Support**: Support for text, voice, and visual interactions
## Getting Started
1. Configure your agent's behavior and appearance
2. Set up the [lead capture form](/share/lead-capture-form) if you want to collect contact info
3. Choose your preferred sharing method
4. Customize the user experience settings
5. [Publish and share](/share/publish) your agent
The Shared system provides a comprehensive platform for deploying AI agents with full control over the user experience and data collection.